
If you’ve been looking for a hobby to bring out your creative side and dabble in a form of art, you might be surprised to know that candle making is a surprisingly artistic hobby that is very easy to get started with.
Not only can you create your own candles with a range of visually appealing colors and designs but you can also modify the fragrance of each candle, meaning the creative possibilities are almost endless when it comes to candle making at home.
Part science, part creativity, and part therapy.
Candle making could be that therapeutic release you’ve been looking for and there has never been a time when it’s so easy to get involved.
Candle Making as a Hobby
If you’ve ever browsed the seemingly endless selection and variety of candles for gifts or to decorate your own home with then we wouldn’t blame you for assuming that this could only be done through mass production and factories.
While that might be true for some of the larger brands, candle making at home is actually a surprisingly easy thing to do yourself (or in a group) and is a very popular hobby in the arts and crafts space.
There are a few main reasons for its popularity and some include:
- Minimal skill requirements
- Easily accessible products and equipment (a quick trip to your local craft shop or Amazon order will set you up with everything you need to get started)
- A creative outlet (there is a dual-level of creativity for the visual aspect and the scent/aroma)
- It’s therapeutic and relaxing
- They make excellent gifts for family and friends whilst also being something you can use around your own home (scented candles at bath time, anyone?)
- You can sell your candles and create a part-time or even full-time business depending on how much you develop your skills.
There are no skill requirements when it comes to getting started in candle making and while it’s not something that you will get perfectly correct on your first attempt (though some people might have a natural knack for it), you’ll soon be addicted to the process once you’ve successfully made that first one.
If candle making is something that has piqued your interest or something you’ve been wanting to try for a while, we cover some of the key aspects below so that you can quickly and easily get started on your own creations.
You never know, this could even be something that you do for a living one day!
Who Is Candle Making Best Suited To
Before we delve into the process of making your own candles, you might be wondering whether candle making is for you? In all honesty, candle making is something that is open to almost everyone.
The starting cost and skill requirements are low so this is an ideal hobby for an individual, couple, group, or even a family. The only point we will make is that heating wax will of course carry some risk.
This is a safe and enjoyable hobby to do with your children as long as there is a responsible adult present to supervise.
Besides that one word of caution, candle making is a hobby that is open to just about anyone that wants to unwind and create something that is visually stunning and unique in terms of the scent.
How Much Time Should You Commit to Candle Making
Candle making can be as quick or as drawn out as you’d want. Unlike some hobbies that can be very time consuming, candle making is something that you can pick up in short bursts for a little mental break and for a creative outlet.
In terms of prep time and the candle making process, the candles can be created anywhere from 10-30 minutes depending on the technique/equipment you use and how many candles you are trying to make.
The only time-consuming aspect is the wait…
Candles need time to set and most expert candle makers will recommend leaving your candles overnight to set (which is a minimum time requirement in some cases and 24 hours is more common).
Therefore, the candle making time is short and low effort but the full process can be lengthy while you wait for the candle to set.
This really isn’t an issue though as most people do not get into candle making for a quick result, the initial creation and then patience waiting for the candle to set is all part of the process.
If you want a quick endorphin spike then candle making probably isn’t for you.
Will You Need to Do a Course or Get Training
There are very few requirements needed when it comes to basic candle making at home. Watching a few YouTube videos, reading a few of our related articles and some basic products/equipment are all you need to get started.
With that said, there are some specialist courses (or workshops to be precise) that you can take in order to improve your skillset.
This will help you go from creating basic designs and scents to producing professional-quality candles that are not only eye-catching but also hold their scent for longer.
How to Make Candles at Home
Amazon, your local craft (or DIY) store, and even your local supermarket are all places where you can easily pick up the necessary products to start candle making from the comfort of your own kitchen table.
In this section, we’ll run you through the essentials that you need to get started and also how you can make your very first candle, and trust us, it’s easier than you might think!
What Products and Equipment Do You Need
There are some basic products, equipment, and ingredients that you will need to get started and for the most part, you will likely already have some of the more standard household items.
Costs can vary, however, as we mentioned earlier the starting costs are actually quite low. Once you have the basic equipment, it can actually end up being cheaper to make your own candles than if you were to buy them from the store.
Once your skills and interests grow, you can then buy more expensive ingredients if you wish and this is something we will cover shortly. For now, the below are your bare essentials.
Wax
The most important item you need for candle making is of course the wax, and there are definitely some types of wax that are better suited to candle making than others.
The most popular waxes used for making candles are soy wax and paraffin wax. Both have some benefits and drawbacks whilst you can also get a parasol blend which is more expensive but offers the benefit of both.
Soy wax is a natural and renewable product that burns slower and lasts longer. It also burns cleanly like the lesser-used beeswax meaning they produce less soot as they essentially burn without leaving much of the black petro-soot that you will find on jars that use paraffin wax (though they are not entirely soot free).
Paraffin wax is made from petroleum and is often the cheaper option, it also holds and releases a much stronger fragrance though it’s not a renewable or biodegradable source.
The choice of wax at this stage is entirely based on personal preference and will usually come as a bag of flakes.
Jar
The jar you use will play an important part in the decision making process for beginners.
This is because you might want to be more cost-effective with ingredients early on to avoid unnecessary waste and to also make it significantly easier when measuring quantities.
For ease of purchasing, sets of jam jars will work perfectly. You can buy candle-specific jars and overtime it’s definitely a good idea to experiment with different sizes and shapes to use as a mold and container but for beginners, a jam jar is an easy starting point.
Wicks
Choosing your wick is another crucial element as the size of your wick will dictate how long the candle will burn for and also how large of a flame it produces (which will ultimately influence how strong the scent is that is released).
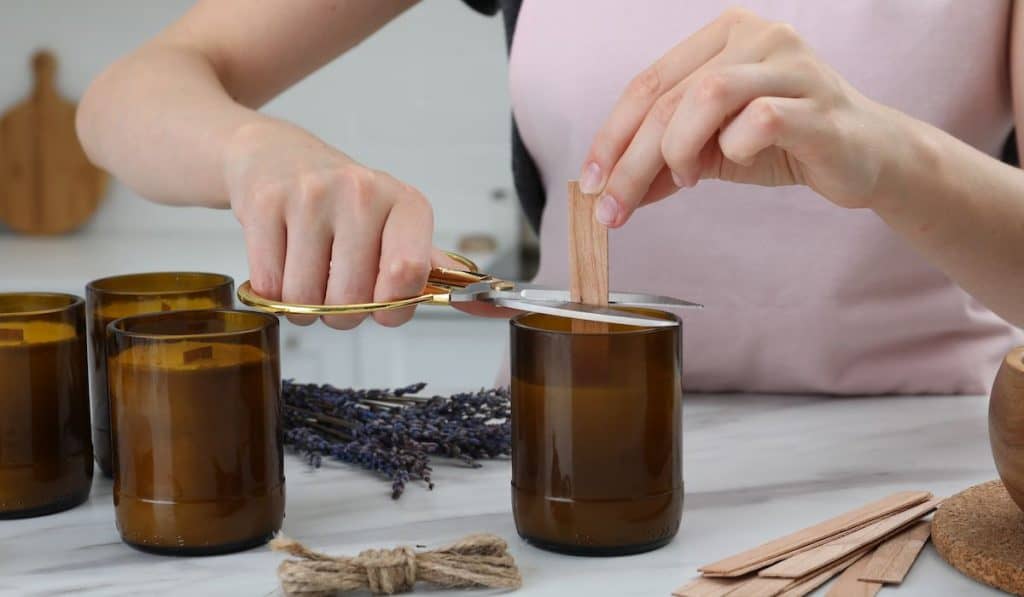
There is a range of wicks available from ready-made wicks with glue stickers and holding clips attached to more basic options that are your more DIY options like wrapping the wick thread around a popsicle stick to hold it in place.
Whilst materials can vary, you will usually find that the wicks used will depend on the size of the candle you are making as well as the wax used.
Therefore, the list would be too extensive to list here and the product description will usually give you the best idea.
One very useful resource that you can use though is the wick size guide which can be found here.
This very handle tool will help you choose the most suitable wick depending on what wax you are using.
Melting Implement
There are actually a few methods you can use to melt your wax and the most popular option is a double boiling method.
This involves heating some water in a saucepan and then adding a pan with the wax over the top of this to melt the wax.
This can also be done with a stove pitcher being placed into the initial pan, in either scenario, this helps to prevent the wax from burning and allows it to melt at a steady and consistent pace with some stirring required.
This isn’t the only method you can use though and some will melt their wax in the microwave which can produce equally good results but requires much more effort to continuously stir the wax and get it to the required temperature for adding dye and fragrances.
The microwave is certainly the trickier option but just know that it is an option if needed.
Dye & Fragrance
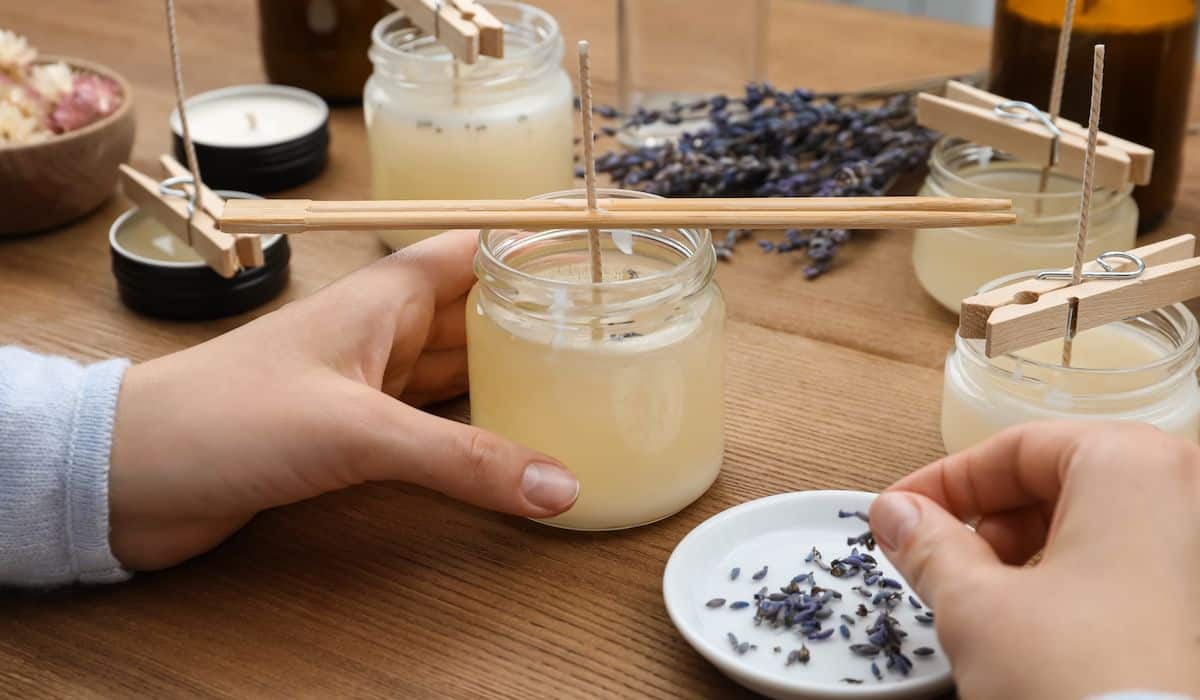
The final aspect is the customization that comes with selecting your color dyes (or wax crayons work just as well for a more DIY touch) and choice of fragrances.
The options here are endless, you may already have some scents you prefer like citrus, wood, fruit, herbal, or floral and the combinations you can make are entirely up to you.
The same applies to colors, if you need some inspiration just take a look at this video showcasing some unique marble designs that you can create.
Other Equipment
Alongside these key items that are very specific for candle making, you will also require a few additional items that can typically be found in most households already.
- Oven glove for safely handling the hot implements
- Newspaper or an old sheet to prevent hot wax from damaging and worktops or surfaces
- Thermometer for monitoring the melting and cooling temperatures
- Stearing which is mixed with the dye to give the candle a more opaque coloring.
How Much Does It Cost
This isn’t the cheapest hobby you can pick up but it’s also far from expensive.
Once you purchase some items in bulk like the wax and wicks (whilst making use of some jars and containers that you may already own) the candles can be cheaper than those that you purchase from a store.
The reason why it may not be cheap is because of the range of fragrances, quality of the wax, and general presentation can certainly be leveled up over time as your skills are honed. Therefore, the cost of candle making can be as small or as large as you’d like.
One disclaimer that we need to put out there is that candle making does require some trial and error in order to get the ideal scent you want, length of burn time, and overall consistency of the end product.
It is very likely that your first few batches will not come out 100% the way you want and it’s best to accept this eventuality before you get started as your first few will likely cost more than a store bought product and not be the same quality.
That is part of the fun and the challenge though and you never know, you might have natural talent right from the start.
What Type of Candle Do You Want to Make
We’ve mentioned that there is a great deal of variety when it comes to candle making in terms of the products you can use and styles that you can customize but there is a further element that should factor in before making your first candle and that is what type of candle you want to make.
You may have seen the popular Yankee Candle brand and noticed they have candles in a range of sizes in the traditional jar styling.
This is a common design and something we would definitely recommend starting out with, however, these are not the only options.
Other types of candles include tea light candles, pillar candles, dinner candles (traditionally used in candlesticks), and votive candles.
These are definitely something that you would need to work up to in time as they require different skills and techniques to create varying candle styles.
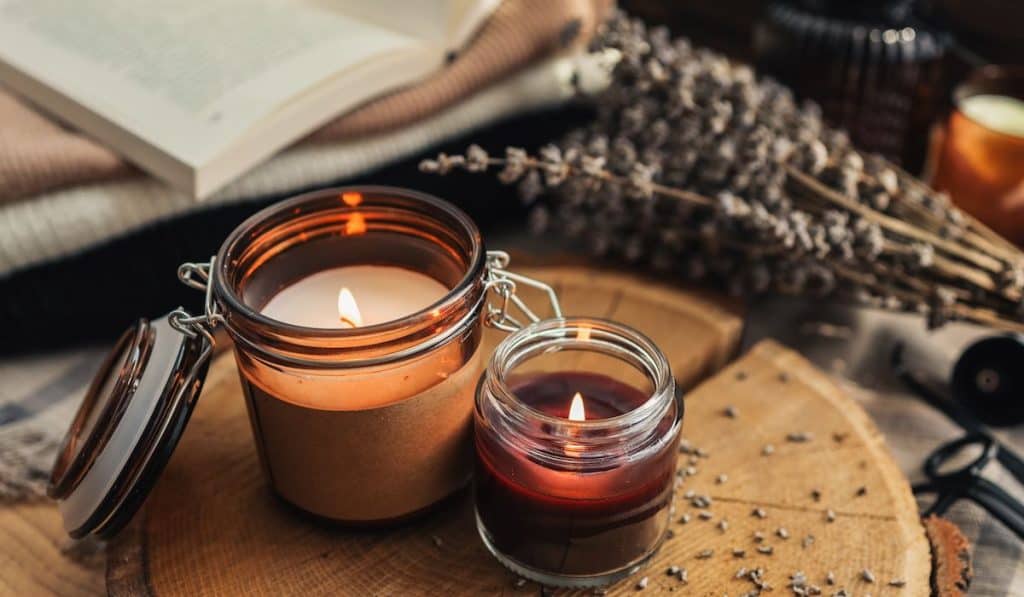
For our guide, we will walk you through making a very basic scented candle in a jar.
Candle Making Process | Step by Step
Candle making is generally quite simple for the most part, the below is a basic example of how to go about making your very first candle.
Step 1 – Attach your wick centrally to the bottom of your jar with a glue sticker or glue gun and hold the wick in place with a clip or popsicle stick.
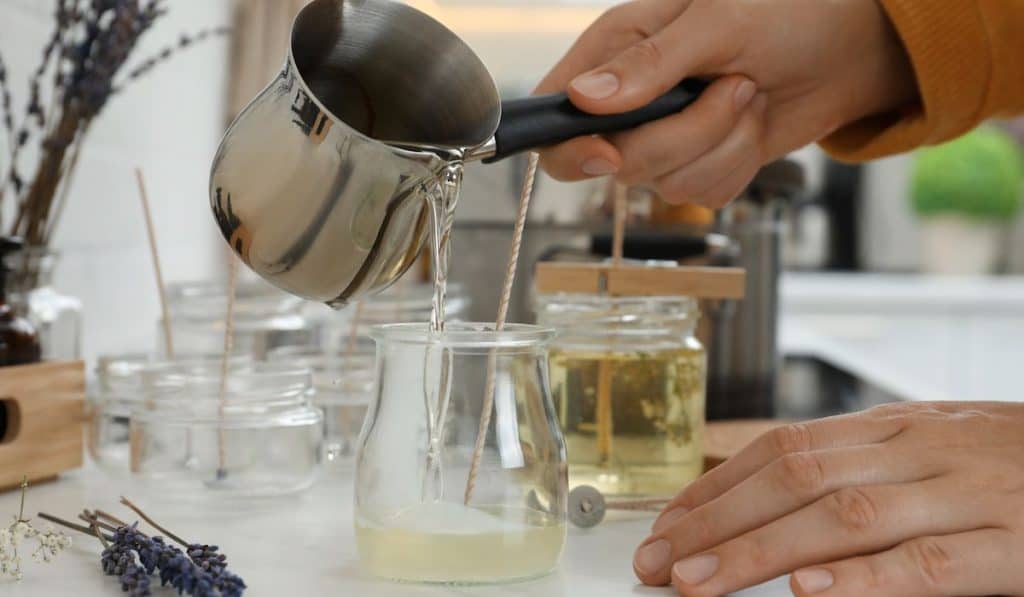
Step 2 – Melt your wax in a double boiler until it reaches a temperature of 180°F to 185°F. Continuously stir the wax to ensure it doesn’t burn and that it is melting evenly. It’s also important to note that this is the ideal temperature for both soy and paraffin wax.
Step 3 – Add your dye and fragrance to the wax and stir it in and allow it to cool to around 115°F to 130°F. A good guideline for fragrance is 1oz per 1lb of wax and this is where the scientific element merges with creativity as you will need to experiment with this to get your desired scent.
For colored dye, there is no real guideline so look at add ½ – 1 teaspoon of dye and see how vibrant it becomes. The cooling temperature is also important, you shouldn’t pour your wax until it has cooled as it will shrink and create sinkholes if you pour it straight into the jar from high temperatures.
Step 4 – Once the wax has cooled down you can now pour it into the jar. It should still be liquid but you’ll notice it will become less clear and this cooler temperature will help it to form perfectly in the jar. For this step, you should also use your popsicle stick or clip to centralize the wick.
Step 5 – Leave the candle to set overnight, for best results you should leave it for roughly 24 hours in a room temperature environment.
There you have it, that really is all it takes and one way of looking at it is that it’s no different from cooking a sauce. The only difference is that if you’re a terrible cook then candle making will still be a good option as you won’t need to eat the finished product.
Rounding Up
If you are looking for a therapeutic hobby that also allows you to tap into your creative side then candle making could be a hidden gem.
While it’s certainly grown in popularity in recent years with people expanding on the hobby and building successful businesses from it, candle making is still something that wouldn’t even occur to most as a pastime.
For something so easy to pick up though, you never know… You could find a passion and a business in this simple hobby.